
To find out more about my methodology and why I'm building this particular model in this particular way, please read PART ONE.
To see the early stages of this project where I scrape, file, and sand off most of the kit's beautiful details, please read PART TWO.
Rear end with grill.
Now, that grill didn't appear onscreen until the 1997 Special Edition of Star Wars, whereas, before, the model had a simple rectangular piece of translucent white plastic (below) to represent the massive power of the engines and the ship wasn't seen from behind when the engines weren't active.
I'm not sure, but this may have been about the time the model kits started including the grill because the original MPC kit or the later AMT/ERTL kit only had transparent plastic (to allow for lighting to be installed) for the engine area.
I'm not sure, but this may have been about the time the model kits started including the grill because the original MPC kit or the later AMT/ERTL kit only had transparent plastic (to allow for lighting to be installed) for the engine area.

Original studio model: internal lighting, but no grill.
I'm not going to be including the grill partly because it's a 20-years-late addition to the "lore" of the model, but also because it seems like it would get in the way of, or get melted by, the thrust (not that Star Wars physics has to or does conform to Earth physics). The "nozzles" included in the kit make practical sense (moreso than a flat piece of plastic), so I'll be using those.
Even if I accept that the engine grills come standard on a YT-1300 freighter, it seems to me like something Lando or Han would have removed for greater speed, which would mean I should leave them on...or does it mean they're not standard and one of the guys added the grills? Either way, no grills for me.

Grill removal.
On either side of the engine area are the added strips of styrene I built up which came out pretty much to the outer circumference of the grill, and now (minus the grill) they make the engine nozzles look even more recessed –and I like that.
Like all the other Falcon kit parts that don't get used for my final model, these grill sections will go into my kitbashing parts collection for eventual use on other projects.

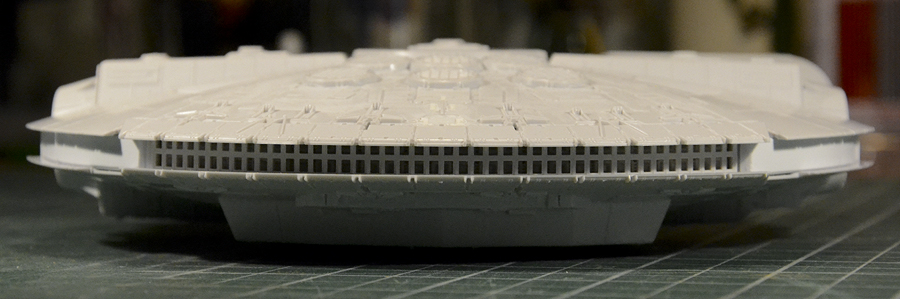
Rear end without grill.
I'll probably paint the nozzles some dark-ish gunmetal or something (many folks have been painting them copper, so we'll see...) and the recesses will be black to suggest greater depth. Since this model will not be in flight but landed in (a showroom), I won't be lighting the engines.

Port side outside.
The most notable feature of this "factory stock" version of the Millennium Falcon compared to the one in the Star Wars films is its relative smoothness and severe reduction of greeblies. My sidewalls here are perfectly smooth, but I'll be adding a few vertical lines with a scribing tool and a few photo-etched bits and pieces here and there so they don't remain completely blank.

Port side styrene additions.
After filing off the greeblies and sanding the sidewalls smooth I felt they were recessed a little too much between the top and bottom hulls, so I applied strips of sheet styrene five layers thick to build out the walls to an outer circumference that worked for me.


Starboard styrene additions.

Limits.
This is a slightly better angle to see the limits of my sidewall deepening; if I went further than the plating on the left, filling in the space seen between the overhanging plates in the middle, it would protrude too far. Same goes for the short bit between the docking ring and the cockpit corridor on the right: I could bring the sidewalls closer to the overhang, but it would protrude beyond the inner wall on the left.

Primed (with new greeblies).
As much as I wanted the Falcon's surface to be pretty smooth, my additions were a little too smooth, so I added some photo etched parts in strategic spots...maybe I should have just scribed a line or two on the back parts instead...

Mandible cover greeblies.
I would have preferred something circular, but the PE parts from my Russian tank (Trumpeter's T-64AV Mod 1984) donor kit only had two really good circular parts with mesh (rather than four), so I sliced off four identical rectangles from two other bits.

Maintenance cover greeblies.
These planes were too plain as well, so I added the straight bits from the tank kit and the three-pringed bits come from the Green Strawberry PE set I got for the Falcon (but they go inside the gun turrets, which I won't be using –I think I'll just black out the windows).

Port side greeblies.
More tank kit PE parts to add some interest to (and cover some gaps in) the smooth, flat styrene I added.

Starboard side greeblies.

Actuators.
That's a lot of greeblies, to be sure, but the functionality of these "actuators" was too good to leave out. After all, I kept various details I felt were linked to the task of cargo handling/grappling, so this was an easy call (but I almost got used to how good the smooth engine flaps areas looked...).

Re-puttied.
Once the primer goes on, you can really see any imperfections that might need fixing. I already knew that I gouged the hell out of the upper and lower hulls when I was chiseling the molded details off, but the primer test revealed the worst dents.

Unlikely-to-be-seen photo etch.
I got the Millennium Falcon photo etch set from Green Strawberry mostly for the fine landing gear details and decided to practice a bit with some unimportant parts (which might never be seen) because I'd never worked with PE before (apart from just attaching some to the sidewalls). It's tricky and delicate but it adds some better realism in areas where the kit parts are too thick.

Landing gear test fit.
The main reason I got this photo etch set was because the kit parts for the circular bits on the landing gear were too thick and cutting out all those holes would have been harder than dealing with PE. They didn't turn our perfectly, but I'm hoping they'll look better once painted. I may or may not use the PE parts for the gear doors...we'll see.And speaking of which, there's a lot of painting to get to before certain sub-assemblies are finally attached to the ship (landing gear, cockpit...maybe I'll do the ramp down, maybe not...). Part Four will deal with all of that and Part Five will be the start of The Showroom itself (which is still being designed).

Comments